CA UIM (Unified Infrastructure Management, formerly Nimsoft Monitor) is a scalable IT monitoring solution that provides 360-degree visibility into systems and infrastructure performance. It delivers a single, unified architecture for both traditional and cloud environments, enabling you to proactively monitor performance and availability to ensure that your customers are up and running.
If you have any questions or require assistance in configuring this integration, please contact our Support team. For information on integrating Digital Experience Insights – Infrastructure Management, refer to the documentation CA DXI IM → Integrating Other Products → Integrating PagerDuty by CA Technologies.
Click here to access the email based integration guide.
Click here to view the comprehensive probe guide for the PagerDuty gateway.
In PagerDuty
- From the Services menu, select Service Directory.
- On your Services page:
- If you are creating a new service for your integration, click +New Service.
- If you are adding your integration to an existing service, click the name of the service you want to add the integration to. Then click the Integrations tab and click the Add a new integration hyperlink.
- Select your app from the Integration Type menu and enter an Integration Name. If you are creating a new service for your integration, in General Settings, enter a Name for your new service. Then, in Incident Settings, specify the Escalation Policy, Notification Urgency, and Incident Behavior for your new service.
- Click the Add Service or Add Integration button to save your new integration. You will be redirected to the Integrations page for your service.
- Copy the Integration Key for your new integration.
- Next, click Integrations, and select API Access Keys.
- On your API Access page, click the +Create New API Key button.
- In the dialog that pops up, you’ll be prompted to enter a Description for your key. You will also have the option to create the key as Read-only; leaving this box unchecked will create a full access key.
- Once you have filled in your options, click Create Key.
- Once you click Create Key, you will see a dialog displaying your key and confirming the options you filled in on the previous step. Copy this key and keep it in a safe place for later use, as you will not have access to the key after this step. If you lose a key that you created previously and need access to it again, you should remove the key and create a new one. Click Close once you have successfully copied your key.
In CA UIM
- Download the PagerDuty Gateway probe
- Open the CA UIM Infrastructure Manager. Please note: You must use a UIM version above 8.51+ with JRE 1.8+ for this integration to work.
- Drop the pagerdutygtw probe into your UIM archive.
- Deploy the pagerdutygtw probe to your primary UIM hub.
- You should now see a Marketplace folder under your UIM hub.

- Now you will need to create a queue to route messages to PagerDuty:
- Go to your primary hub and open the hub probe.
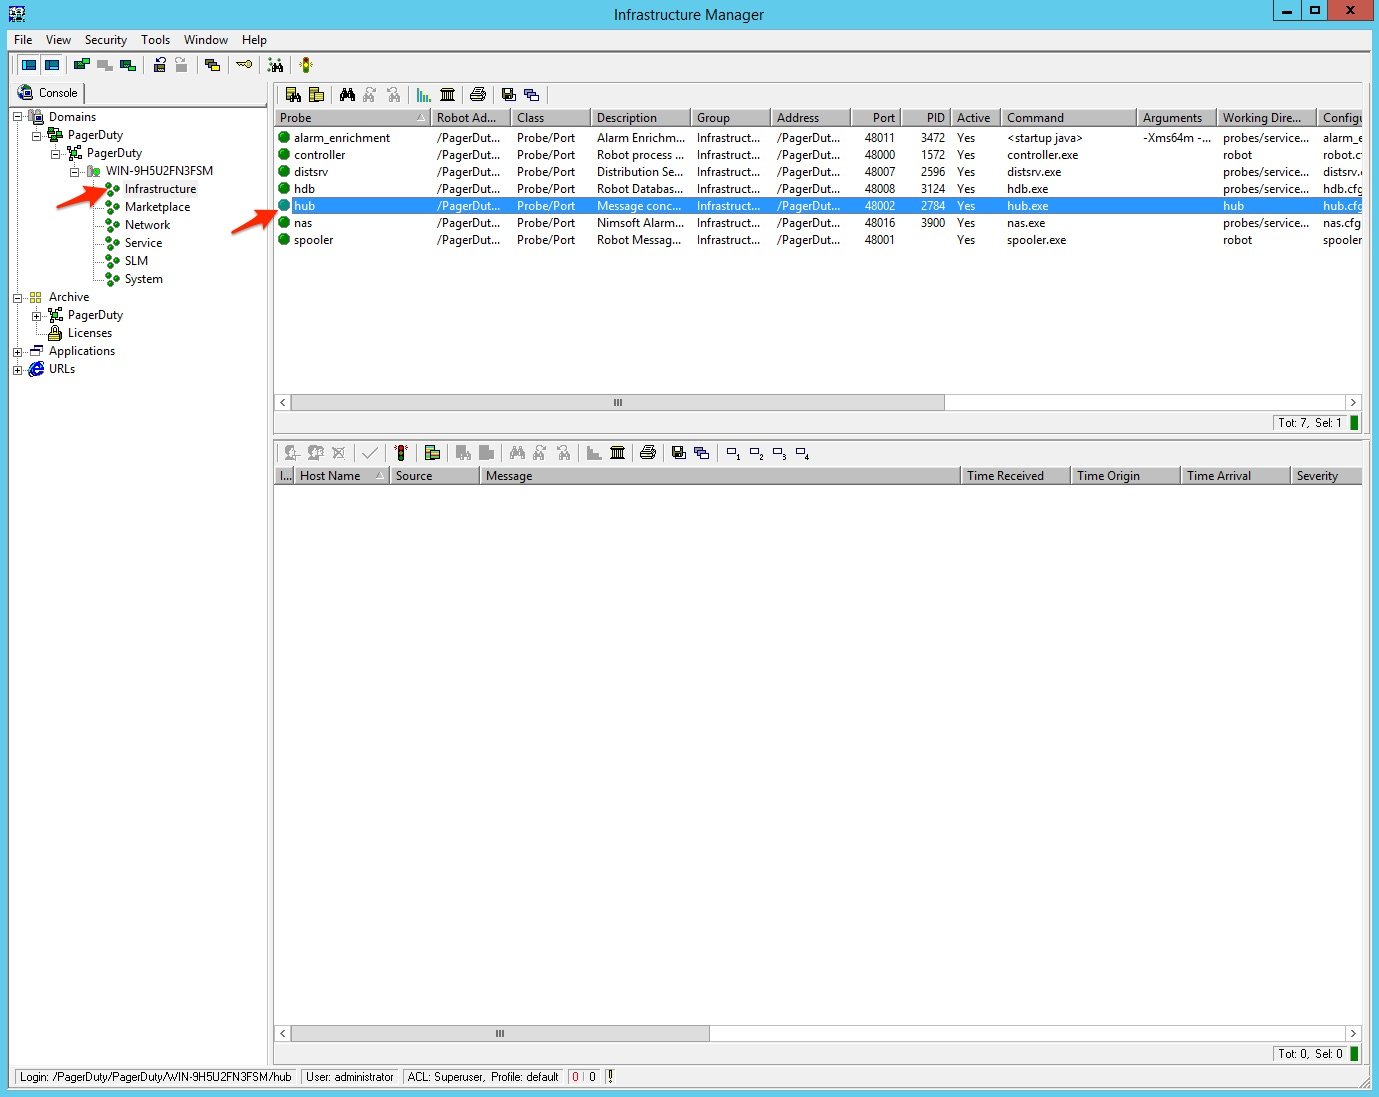
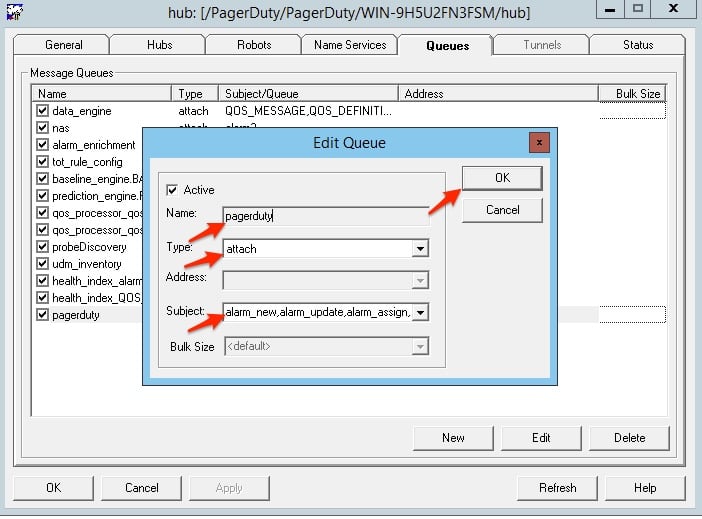
- Go to the Queues tab and and click create a new queue.
- Name the queue pagerduty.
- For Type select attach from the drop-down menu.
- Then, for the Subject, select the alarm types that will be sent to PagerDuty. The subjects required are the following (you can copy and paste these to prevent potential errors):
alarm_new,alarm_update,alarm_assign,alarm_close
- Click OK to save the changes.
-
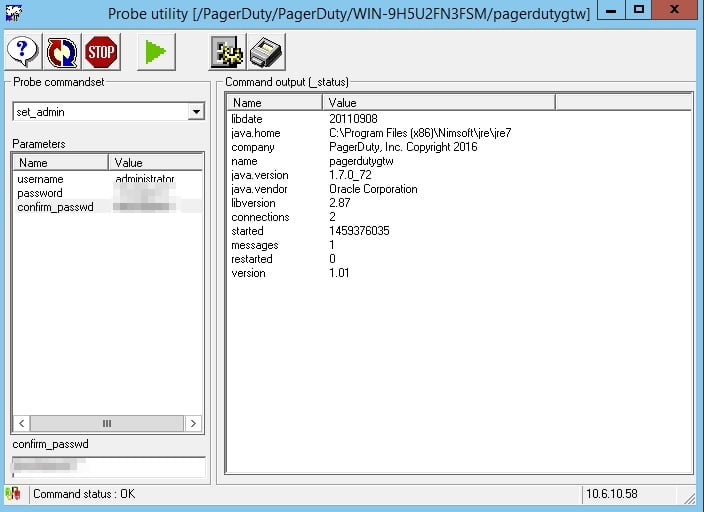
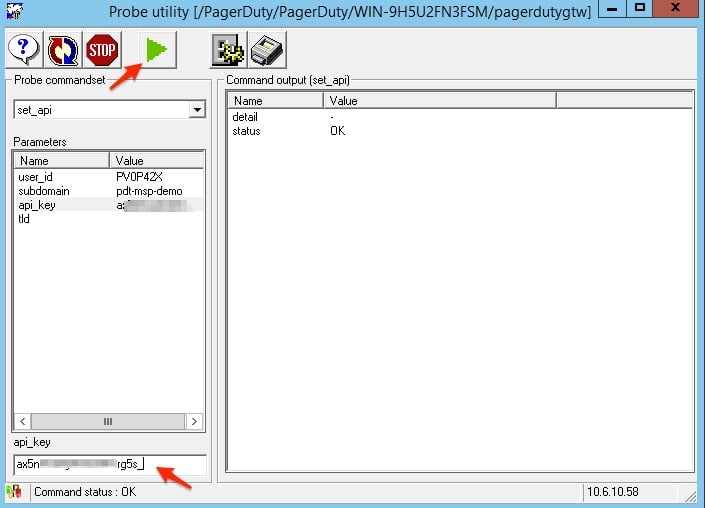
Use the Probe Utility (select the pagerdutygtw probe and press ctrl+p) to call the set_api callback. (note: you will need to be an admin to complete these steps). Now, we need to give the probe specific access rights.
- Select set_admin from the drop-down menu and provide the UIM username and password. Then, click the green play button.
- Next, in the probe utility, select set_api from the drop-down menu, then fill in the following:
- To get your user_id go to your My Profile page in PagerDuty, and grab the alphanumeric number in the URL:

- For the user_id enter in your alphanumeric user id number.
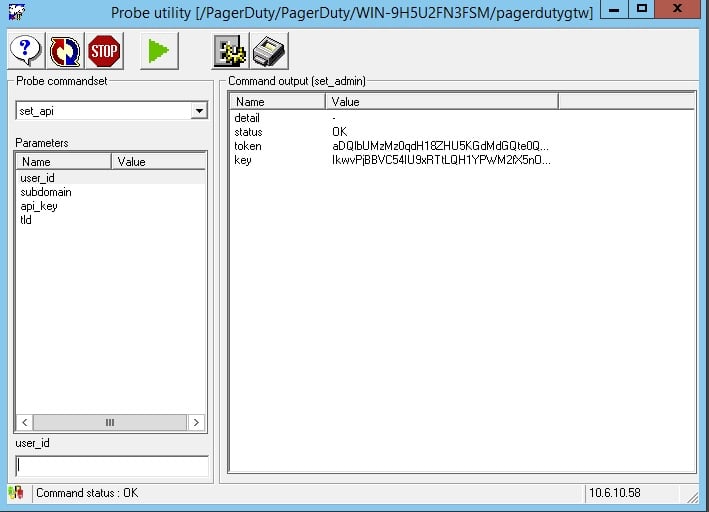
- In the subdomain field, enter in your PagerDuty subdomain (note: .pagerduty.com is not required).
- Earlier (step 6 under the ‘In PagerDuty’ section of this guide) we created an API access key, in the api_key field enter in your PagerDuty API access key.
- After adding in the API access key, click the ‘play’ button and you should receive a ‘Command Status: OK’ at the bottom right-hand corner .
- Now we are ready to tell the pagerdutygtw probe which UIM alarms should be forwarded to PagerDuty. Double-click on the pagerdutygtw probe.
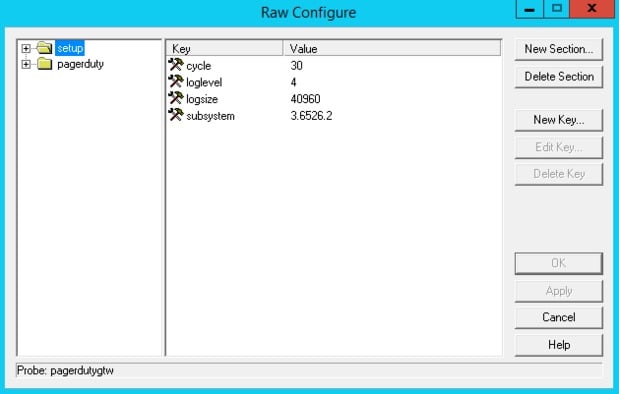
Note: The following instructions are provided as a simple example to forward “critical” UIM alarms to PagerDuty. For more advanced mappings between UIM and PagerDuty, please reference the PagerDuty Gateway documentation referenced at the beginning of this guide.
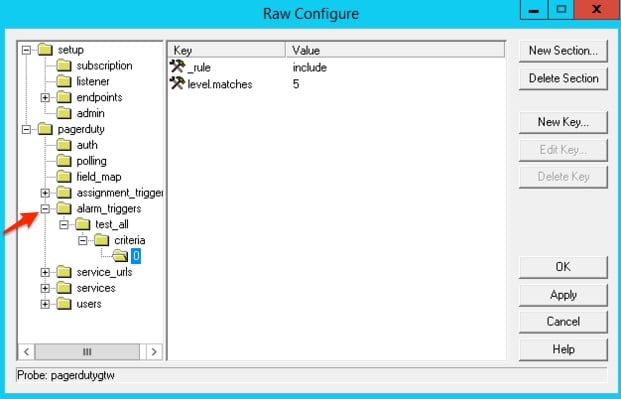
- Navigate to the alarm_triggers section and configure the settings as desired to choose which UIM alarms will be sent to PagerDuty.
- Set the alarm to active and select yes.
- Enter in your PagerDuty integration key in the service_key field.
- Optionally, to constrain the alerts that get reported to PagerDuty to only critical UIM alarms: under alarm_triggers → test_all → criteria, create a new criterion with its _rule set to include and level.matches to 5.
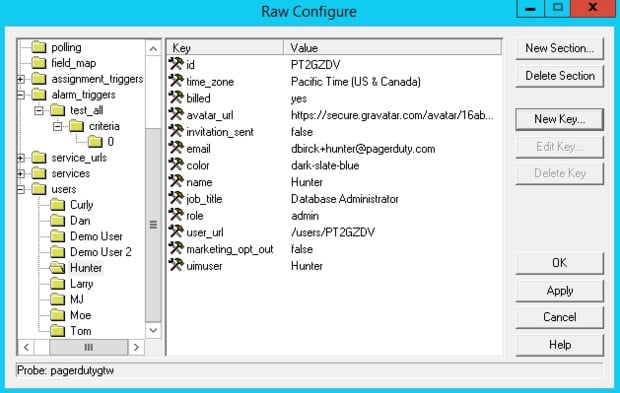
- Within the users section of the probe, create a new key for each PagerDuty user called “uimuser”, and be sure to enter the users UIM user name here. This will keep the alarm records in sync to know who did what (and assumes that user IDs may be different between the 2 systems).
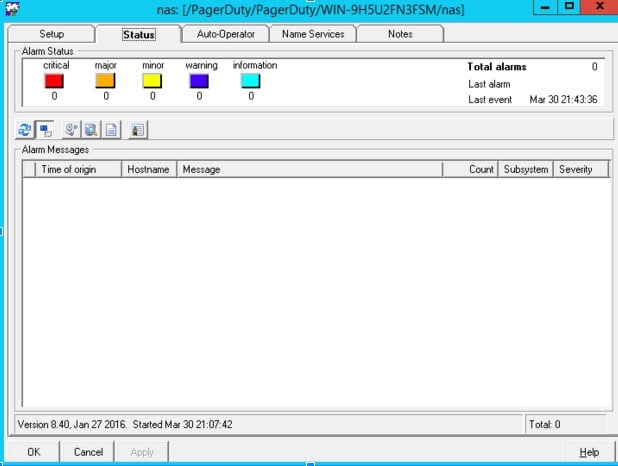
- To test the integration, open the CA UIM nas probe. Right-click on the lower half of the status tab and choose send test alarm. Make sure the test alert severity is critical.
FAQ
Is this probe bi-directional?
Yes it is! Alerts that are acknowledged in PagerDuty or in CA UIM are automatically synchronized between the two products.
Can I integrate CA UIM with multiple PagerDuty services?
Yes! You can configure sending alarms to different PagerDuty services in the Alarm Trigger section.
How can I troubleshoot this integration/see the logs for this integration?
You can view the logs by right-clicking on the probe and selecting view logs.
How can I see what version of the probe I am using?
By clicking open the probe, which shows the content/probe package.
I’m getting an error in the logs that reads “waiting for probe to finish starting.” How do I fix this?
Go to Marketplace under the main UIM hub. Right click on the probe (pagerdutygtw) and select “Restart”. If that does not work, disable and then re-enable the probe.


