- PagerDuty /
- Integrations /
- Lilac Reloaded Integration Guide
Lilac Reloaded Integration Guide
Nagios is one of the leading providers of open source and enterprise-grade IT infrastructure monitoring tools. Used by hundreds of thousands of users worldwide, Nagios allows its users to monitor their entire IT infrastructure, spot problems before they occur, detect security breaches and plan/budget for IT upgrades. "Lilac Reloaded" ("Lilac") provides a very convenient web-UI that can be placed alongside your Nagios web-UI, to make the setup and administration of Nagios easier. The guide below describes how to install Lilac onto an existing Perl script -based Nagios integration. This assumes you've successfully completed this guide before proceeding: https://www.pagerduty.com/docs/guides/nagios-perl-integration-guide/
If you are having trouble completing the installation, please contact us.
Getting Started
Since we've already setup all of our PagerDuty service settings, the entire setup will occur on your Nagios server:
- Let's download (hopefully) all the necessary dependencies before installing Lilac:
sudo apt-get install php-pear php5-mysql mysql-client-core-5.6 nmap php5-curl mysql-client-5.5 mysql-serverNote: You may have to use a different version for mysql-client-core.
- Download the latest "tarball" of lilac from https://sourceforge.net/projects/lilac--reloaded/.
- "Untar" lilac in the document root. For example, on Ubuntu/Debian systems, this is typically the
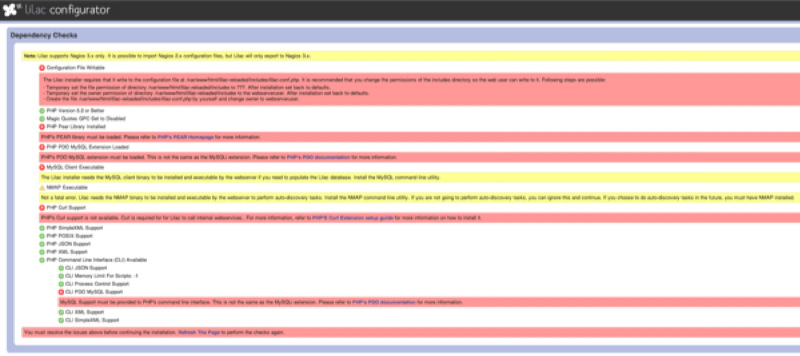
/var/www/htmldirectory. - That's it for the initial part! You should now be able to visit the lilac UI from http(s)://my_nagios_server_domain/lilac-reloaded/. If you have unmet dependencies, Lilac will list them on the setup page:
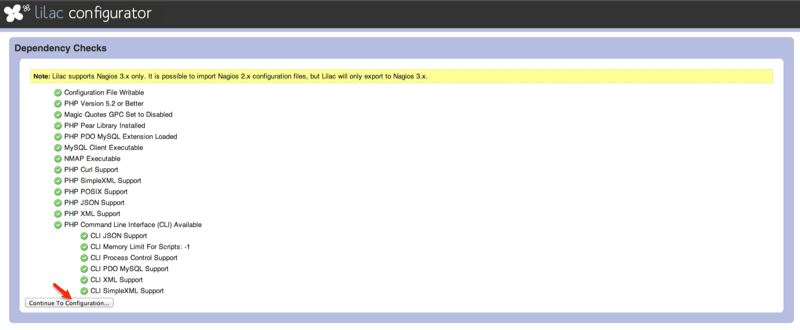
- Once you ensure all your dependencies listed in step 1 are met, Lilac will allow you to proceed:
- You will now need to allow your Lilac instance to connect to your MySQL database:

- Once the connection to the database is complete, you should get the following message:

- You will now be able to start setting up your Nagios integration with PagerDuty via the Lilac UI. From the main page, select Contacts:

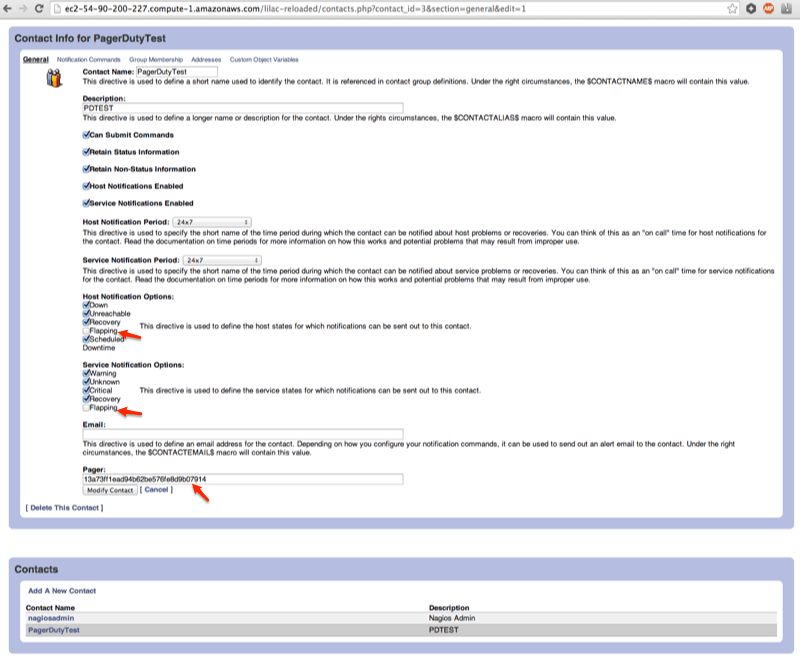
- Create your new PagerDuty contact with a setup similar to:
- Add your new contact to the admins group:

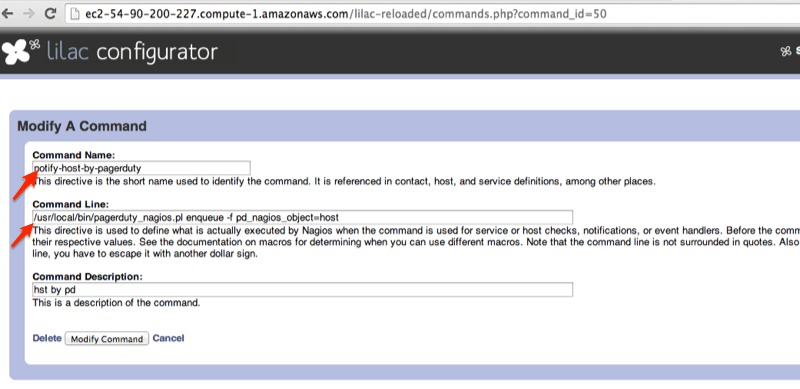
- Create your notify-host-by-pagerduty and notify-service-by-pagerduty commands, as follows:
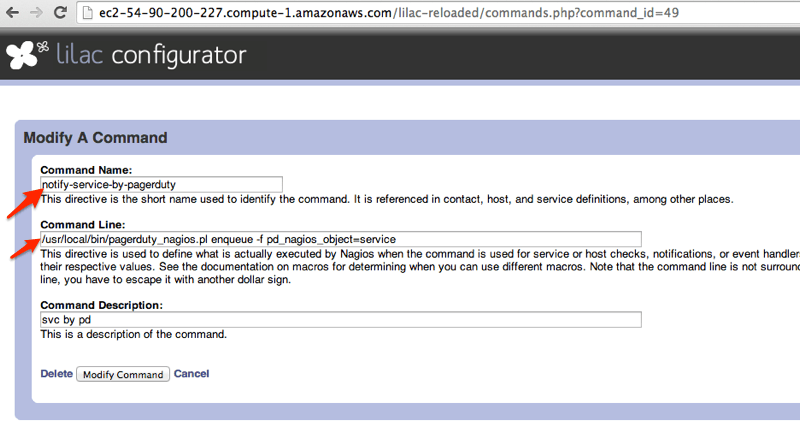
- Ensure that your new commands are tied to your PagerDuty contact:

...That's it! You've now configured a PagerDuty service with Nagios entirely through the Lilac web-UI, without having to manually update any Nagios configuration files.
Ready to get started?
Try any product on the Operations Cloud for free.
No credit card required.